


To Outerbase with Bun, ToastUI Editor and ChatGPT
Integrating the ToastUI markdown editor with Outerbase using Bun tooling, and topping it off with ChatGPT


This article is about exploring the new talk of the town, bun, getting to know Outerbase, and hanging out with old buddies markdown and ChatGPT. If you follow along, you'll get to know how the oven was heated, to bake fresh plugins for Outerbase.
Introduction
When I learnt about the Outerbase hackathon on Hashnode I was intrigued about it. I thought it was another database, "base" being the operative word. But I was only half right, or maybe half wrong, it depends on whom you're asking. Outerbase is an interface to your data (currently only residing in some relational databases), but it adds a lot of bells and whistles to make it interesting.
Some of the features include:
Commands: These are functions in the cloud (Lambda functions?) that can talk to your database. You can create a chain of nodes to handle different steps of the process (AWS Step functions? Of course, it is not there yet but maybe soon...)
EZQL: It enables you to ask questions to your database in plain text. No more making your own SQL queries.
Plugins: Your data tables are much more than a spreadsheet, Outerbase plugins enable you to visualize that. You can add different plugins for different types of data, and interact with it in a way that feels native.
The last feature is what caught my fancy, and I decided to focus on that for this hackathon. Here is a short video demo of the plugins that I created.
Preparing the base with Bun
Since I decided to focus on plugins, I wanted a way to quickly create the basic template on top of which I could build upon. One way was to just get the template from the Outerbase repo and copy-paste it to create more of it. But where is the fun in that? There is a saying, "Automate it, silly." (Even if it takes you days to build that automation). So that is the path I took.
Creating templates
You can create local templates (and maybe publish them later on) with Bun and then run a simple command to use that template. Your local templates should be present inside a .bun-create folder in the following paths
$HOME/.bun-create/<name>: global templates<project root>/.bun-create/<name>: project-specific templates
<name> is the template/folder name you want to use. Drop your template files into the template folder and run the following command to use that template
# Notice the "./" in the beginning. Without that it looks
# for the template on Github (bug).
bun create ./<template-name> <destination>
There are two types of Outerbase plugins;
Table plugins: these work on the whole database table, and
Cell plugins: made for working with a cell but applied on a column so that they're available to all the cells of that column
An Outerbase plugin consists of at most three views; 1. The configuration view, 2. The data view, and 3. The data editor/dialog view. These views are created using Web Components (Custom HTML Elements). A basic Outerbase component can be represented as follows
const templateEditor = document.createElement("template");
templateEditor.innerHTML = `
<style>
  #container {
    max-width: 320px;
  }
</style>

<div id="container"></div>
`;

class OuterbasePluginCellEditor extends HTMLElement {
  static get observedAttributes() {
    return [...observed_attributes];
  }

  config = new OuterbasePluginConfig({});

  constructor() {
    super();

    this.shadow = this.attachShadow({ mode: "open" });
    this.shadow.appendChild(
      templateEditor.content.cloneNode(true)
    );
  }

  connectedCallback() {
    this.config = new OuterbasePluginConfig(
      decodeAttributeByName(this, "configuration")
    );

    this.config.cellValue = this.getAttribute("cellvalue");
    this.render();
  }

  render() {}
}
Before we can use this component we need to register this component with the window
window.customElements.define(
  "outerbase-plugin-cell-editor",
  OuterbasePluginCellEditor
);
The first plugin: Audio Player
If your data consists of audio urls, wouldn't it be cool to play the audio from the database view itself? This Outerbase cell plugin allows you to do exactly that.
All the magic of this plugin resides in its Editor view. We simply attach an HTML audio element to the view. Set the audio src and load it. And our audio link is ready to play. Below is the updated render method shown earlier.
render() {
  const srcUrl = this.getAttribute("cellvalue");
  if (srcUrl) {
    this.shadow.getElementById(
      "container"
    ).innerHTML = `<audio id="audio-player" controls />`;
    const player = this.shadow.getElementById("audio-player");
    player.src = srcUrl;
    player.load();
  }
}
The above code allows us to get this view (the audio player dialog)

The second plugin: Video Player
Since we have an audio player for our database now, it is only logical to do the same thing for videos. But this is not that simple. Most of the video links you encounter are YouTube (and maybe some Vimeo) video links, so I set out to make that work.
Now, the URLs that we see in the browser's address bar (watch URLs) for YouTube videos are different from when you want to embed the YouTube player in your website. Assuming the database will store the watch URLs, we need to create the embed URLs. The below function does exactly that using a regex.
getYouTubeEmbedUrl(url) {
  const youtubeRegex =
    /^.*(youtu.be\/|v\/|u\/\w\/|embed\/|watch\?v=|\&v=)([^#\&\?]*).*/;
  const match = url.match(youtubeRegex);
  if (match && match[2].length == 11) {
    return `https://youtube.com/embed/${match[2]}`;
  }
}
Now we can create an iframe, set its src as this embed URL and our player should be ready. We do all this in the editor/dialog view of the plugin.
this.shadow.getElementById("container").innerHTML =
    `<iframe id="video-player" type="text/html" width="360" height="240" frameborder="0" />`;
const player = this.shadow.getElementById("video-player");
player.src = embedUrl;
The above code works fine locally but when deployed to the Outerbase console it fails to load the player. The reason is Outerbase plugins run inside a sandboxed iframe to keep the data secure. The YouTube player needs to use the browser cache to store its assets but the configured sandbox permissions don't allow it, and the player fails to appear.
But the same technique can be utilized for other video hosting platforms, Vimeo being one of them. The problem with Vimeo is that it doesn't have well structured consistent URLs. So we use its oEmbed APIs to fetch the correct URL.
async getVimeoEmbedUrl(url) {
  const res = await fetch(`https://vimeo.com/api/oembed.json?url=${url}`);

  const data = await res.json();
  return `https://player.vimeo.com/video/${data.video_id}?title=0&byline=0&dnt=1`;
}
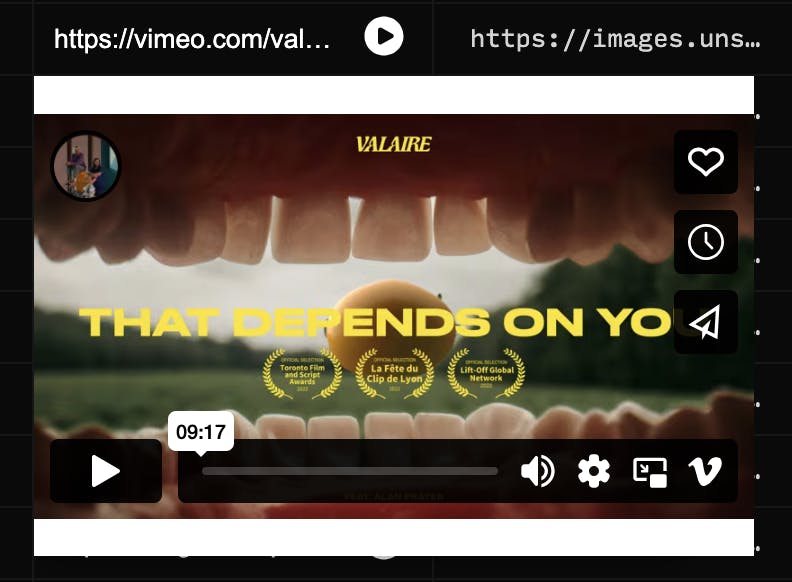
And now we can use the same iframe player to play this video.
&dnt=1 in the created URL. Without that Vimeo player will also follow the YouTube player's way. dnt is "do not track". If it is 0 (the default value), the Vimeo player will try to use browser cookies and will fail as we're sandboxed.dnt parameter saved the day for this plugin, else all that work would have come to nought. Here is the view we get from the player
There is still one error present in the browser console for the Vimeo player, and that is for missing the presentation permission. This can be alleviated by sandbox="allow-presentation" on the parent iframe, or maybe there is some other Vimeo URL query param that can help with that. I haven't explored further as even with the error in the console, the video can be played (The first player load doesn't work, but no problem afterwards).
The third plugin: Markdown Editor
How cool it would be to create blog posts or write docs from the database view itself? This md-editor plugin is exactly what you need for all such cases.
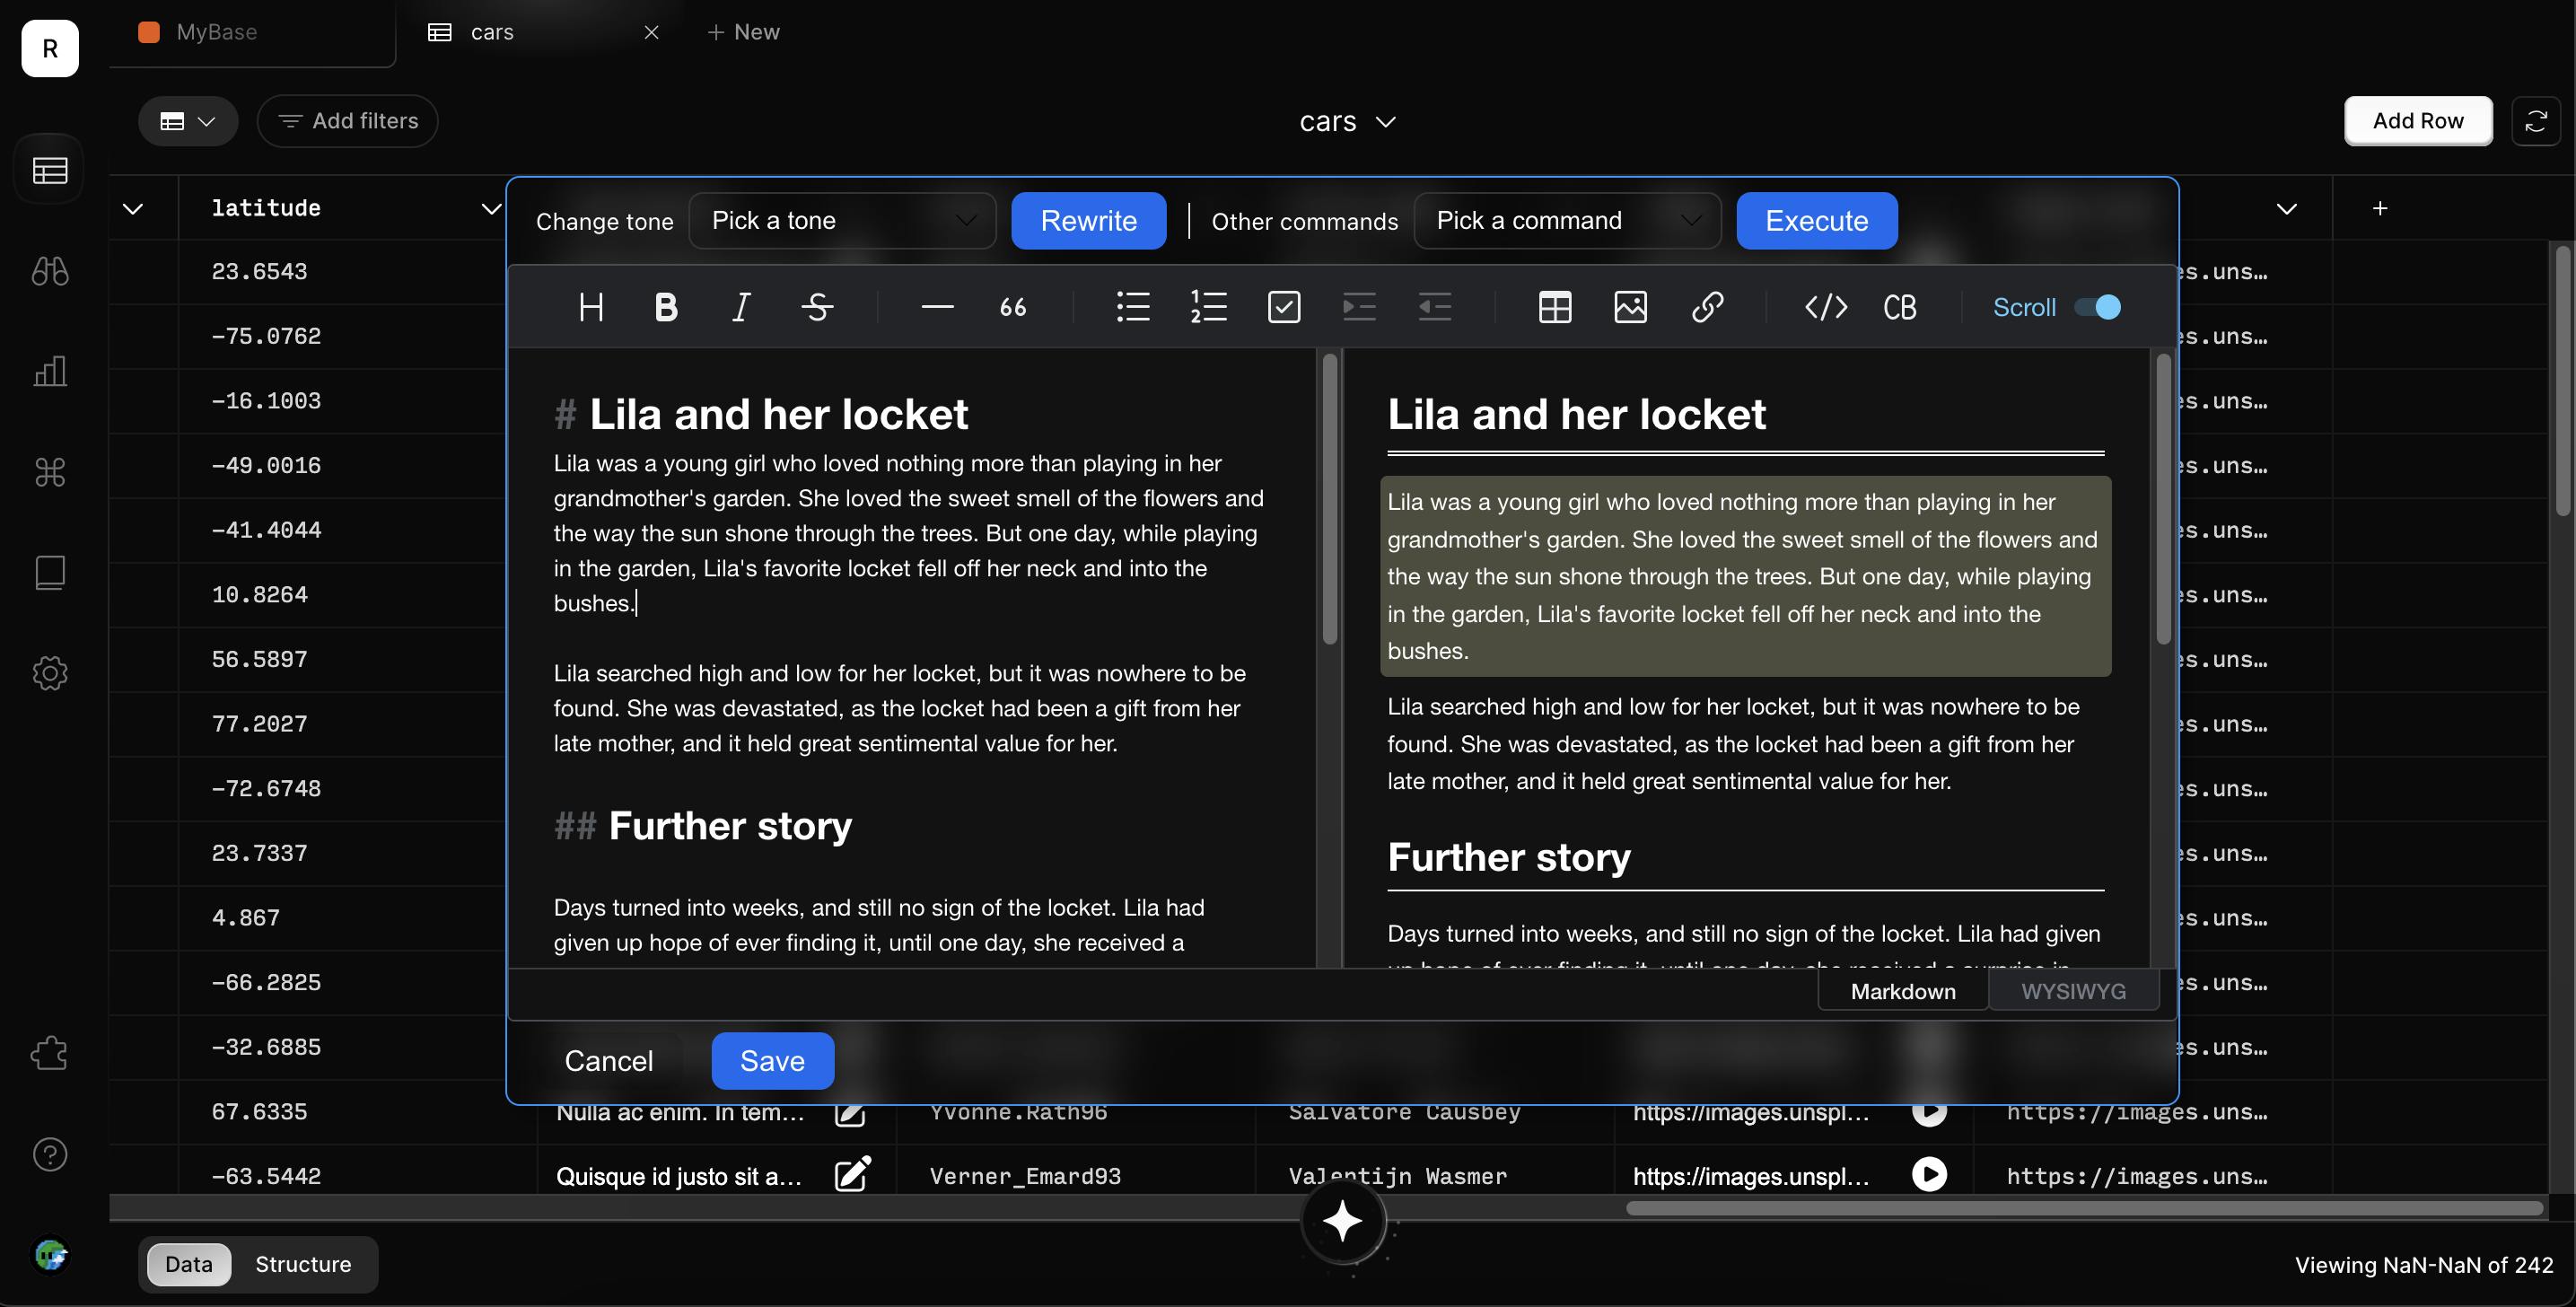
Let's first take a peek at the plugins editor view
This plugin is different from the other plugins we've seen so far, as here we need to use third-party scripts and CSS to achieve the goal. How do we go about this, and which markdown editor to integrate? These are important questions to answer. Let's tackle these questions one by one
How to include third-party scripts and CSS: Even though we're using web components, these are still part of the DOM, so maybe we can create script and link tags dynamically to load these. An example would be as follows
 // JavaScript
 function loadCSS(url) {
   const link = document.createElement('link');
   link.rel = 'stylesheet';
   link.href = url;
   document.head.appendChild(link);
 }

 function loadJS(url) {
   const script = document.createElement('script');
   script.src = url;
   document.body.appendChild(script);
 }

 // Example usage:
 loadCSS('https://cdnjs.cloudflare.com/ajax/libs/bootstrap/4.6.0/css/bootstrap.min.css');
 loadJS('https://code.jquery.com/jquery-3.6.0.min.js');
Which editor to integrate: There are many markdown editors available, but we need something that can work with Web Components (in-browser). I also wanted to avoid any kind of bundling of the scripts with the plugin. This is because the Outerbase plugins can have only so much size, and markdown/WYSIWYG editors are bulky. So we need one which is available from a CDN. I looked at and tried QuillJs (with QuillJs Markdown module), SimpleMDE and ToastUI Editor, and the latter one seemed relatively maintained and worked on the first try so that is the one we integrate.
Using the functions listed just above, if you try to load the scripts and CSS in an Outerbase plugin you'll get the gotcha moment of this plugin; you're not allowed to load third-party CSS because of the CSP (content security policy). What do we do now? Without the stylesheets, it is pointless to integrate the editor. Maybe we bundle the CSS with the plugin (bundling the script is still a NO, due to its size)?
Bun as a package manager & bundler
Now we go back to reading about bun. After reading the docs it became clear that Bun doesn't support bundling the CSS at present. It simply copies the CSS files to the outdir and renames their references. There are two ways out of this:
Create a bun plugin to handle the CSS file bundling.
Read the CSS files from node_modules
Minify using some third-party CSS minifier (no native CSS loader) and,
Inject as text into the final bundle
Simply get the minified CSS files from the CDN, and inject them as text into the plugin code (no bundling needed as the plugin code is very small)
So we pick the easy way out here and pick the second option. Run the bun init command to quickly create a package.json file (so that we can use bun APIs). Create a new file build.js for handling the tooling. This is the function which does what we need. Replacements is just an object where the keys are the identifiers we want to replace with the actual CSS styles.
const bundle = async (replacements) => {
  if (replacements) {
    const indexFile = Bun.file("index.js");
    let indexFileText = await indexFile.text();

    for (const key in replacements) {
      // Fetch the CSS file from the CDN using the URL
      const res = await fetch(replacements[key]);
      const fText = await res.text();

      indexFileText = indexFileText.replace(key, fText);
    }

    createOutput("out", indexFileText);
  } else {
    fs.cpSync("index.js", "out/index.js");
  }
};

const createOutput = (dir, fileText) => {
  const filePath = `${dir}/index.js`;
  const directoryPath = path.dirname(filePath);
  if (!fs.existsSync(directoryPath)) {
    fs.mkdirSync(directoryPath, { recursive: true });
  }

  fs.writeFileSync(filePath, fileText);
};
Since we're in the CLI realm now, added a little complexity to get the file names as CLI input (using commander). You can check the Github repo for the code.
Coding the plugin
First of all, we load the script (remember the CSS is already injected into the plugin, in the style tag of the cell editor's shadow dom, to be precise).
loadToastUiEditor() {
  const scriptSrc =
    "https://uicdn.toast.com/editor/latest/toastui-editor-all.min.js";
  // Optimization to not load the script again
  // and again, as the editor is recreated every time
  if (document.scripts) {
    for (const script of document.scripts) {
      if (script.src === scriptSrc) {
        console.log("script already loaded, bail out");
        return;
      }
    }
  }

  const el = document.createElement("script");
  el.src = scriptSrc;

  el.onload = () => {
    this.render();
  };

  el.onerror = (event) => {
    console.log("failed to load the script", event);
  };

  // We're adding the script to the document and not
  // the shadow dom, because the shadom dom is recreated
  // whenver the editor is opened
  document.head.appendChild(el);
}
As soon as the script is loaded we are ready to show our markdown editor
render() {
  try {
    const Editor = toastui.Editor;
    this.editor = new Editor({
      el: this.shadow.querySelector("#editor"),
      height: "420px",
      initialEditType: "markdown",
      initialValue: this.getAttribute("cellvalue"),
      previewStyle: "vertical",
      usageStatistics: false,
      theme: this.config.theme,
      events: { keydown: this.handleKeyDown },
    });

    this.setEditorPosition();
  } catch (error) {
    console.log("render error", error);
  }
}
Many things are going on here most of which are self-explanatory, I'll briefly touch upon the important points
We open the editor with whatever content the cell was holding
initialValue: this.getAttribute("cellvalue")Because of the way cell plugins have been designed, they pop up near the cell to which they're attached. For our plugin, we need a centred dialog. We achieve that through plain old DOM manipulation
 setEditorPosition() {
   const agPopUpChild = document.querySelector(".ag-popup-child");
   const container = this.shadow.getElementById("container");

   setTimeout(() => {
     agPopUpChild.style.left = `${
       (window.innerWidth - container.offsetWidth) / 2
     }px`;
     // agPopUpChild.style.top = `${
     //   (window.innerHeight - container.offsetHeight - 100) / 2
     // }px`; // -100 offset for outerbase top bars

     agPopUpChild.style.top = "0px"; // Just hardcode at 0px otherwise top border not visible
   }, 10);
 }
The theme is set to the editor using
theme: this.config.themedoesn't work without some manipulation. At the moment we do not receive the theme metadata in cell plugins. The below code finds the theme from the DOM stylesconst agPopUp = document.querySelector(".ag-popup"); const colorScheme = window.getComputedStyle(agPopUp)["color-scheme"]; this.config.theme = colorScheme === "normal" ? "light" : "dark";If we press enter in the markdown editor (to add a new line), the cell plugin editor closes itself (maybe there is a
keydownevent listener somewhere listening forEnterkey events). We skirt through it by stopping such event propagationevents: { keydown: this.handleKeyDown }, //Listen for keydown events from the md editor handleKeyDown(_, event) { if (event.key === "Enter") { event.stopPropagation(); } }
Now we're ready to enjoy our writing with the md-editor. Once we're done, we can click the save button to close the editor and update the cell's content.
const saveBtn = this.shadow.getElementById("save-btn");
saveBtn.addEventListener("click", () => {
  const finalContent = this.editor.getMarkdown();
  triggerEvent_$PLUGIN_ID(this, {
    action: OuterbaseColumnEvent_$PLUGIN_ID.onStopEdit,
    value: finalContent,
  });
  triggerEvent_$PLUGIN_ID(this, {
    action: OuterbaseColumnEvent_$PLUGIN_ID.updateCell,
    value: finalContent,
  });
});
ChatGPT: The secret sauce of the plugin
This plugin comes integrated with ChatGPT to help with your writing with some preconfigured actions. Using it you can change the tone of your writing, get suggestions for headlines, generate a summary for your content, and more.
The below method prepares the UI for showing the tone selections.
prepareTonesSelections() {
  const toneSelect = this.shadow.getElementById("tone-select");
  this.tones.forEach((value) => {
    this.addSelectOption(toneSelect, value);
  });

  const toneBtn = this.shadow.getElementById("tone-btn");
  toneBtn.addEventListener("click", () => {
    const selectedIndex = toneSelect.selectedIndex;
    if (selectedIndex) {
      const selectedTone = toneSelect.options[selectedIndex].value;
      const prompt = `Make the following text better and rewrite it in a ${selectedTone.toLowerCase()} tone`;
      this.handleSelectionAction(prompt);
    }
  });
}
The action is handled in the below method where we go ahead only if some text is selected in the editor. We also show a "Thinking..." text as a loader and finally replace that with the result received from the API call.
async handleSelectionAction(prompt) {
  const [start, end] = this.editor.getSelection();
  const selectedText = this.editor.getSelectedText(start, end);
  if (selectedText) {
    this.editor.insertText(`${selectedText}\n\nThinking...`);
    const currLinePos = end[0] + 2;
    this.editor.setSelection(
      [currLinePos, 1],
      [currLinePos, "Thinking...".length + 1]
    );

    const generatedText = await this.talkToChatGPT(prompt, selectedText);
    if (generatedText) {
      this.editor.insertText(generatedText);
    }
  }
}
Below is the method which makes the API call to ChatGPT
async talkToChatGPT(instruction, text) {
  const res = await fetch("https://api.openai.com/v1/completions", {
    method: "POST",
    headers: {
      "Content-Type": "application/json",
      Authorization: `Bearer ${this.config.apiKey}`,
    },
    body: JSON.stringify({
      model: "gpt-3.5-turbo-instruct",
      prompt: `${instruction}: ${text}`,
      max_tokens: 2048,
      temperature: 0.3,
      n: 1,
    }),
  });

  const data = await res.json();
  return data.choices[0].text.trim();
}
Similarly, we handle the other commands using other appropriate prompts. You can check the GitHub repo for the complete source code of the plugin.
Current Limitations
The cell plugin editors are closed automatically as soon as users click somewhere outside. It would be great to have an option to close the editor when users explicitly click on a button
The changed data does not persist even though correct events are sent to the parent DOM. One workaround is to use the Outerbase commands to make a call to the database, but due to lack of time I haven't explored that
The toolbar items that open a pop-up/dialog in the markdown editor (Heading / Link / Image etc.) do not work. The dialogs get closed as soon as you click on them. This is an open issue with the ToastUI editor where this functionality doesn't work in Shadow Dom. There is a workaround to replace these buttons with a similar button that doesn't open a dialog. Again due to lack of time, this has not been explored.
Resources
The complete source code of the plugins and the templates can be found here
The demo video showing the plugins in action
Conclusion
When you explore a new thing many roadblocks will come. Some roadblocks will have a workaround, and some will be dead ends. Now it is up to you whether you quit on the first roadblock, or push ahead and try to find a way. This Outerbase hackathon was one such adventure for me, and I thoroughly enjoyed it.
Hope you liked reading the article. Do let me know your thoughts in the comments section.
Remember to keep adding the bits, soon you'll have more bytes than you'll ever need :-)
Until text time! Adios.